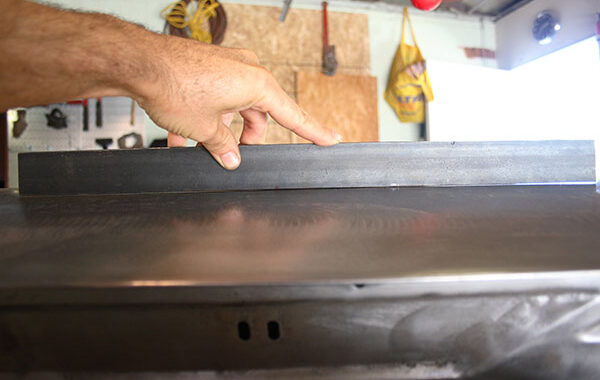
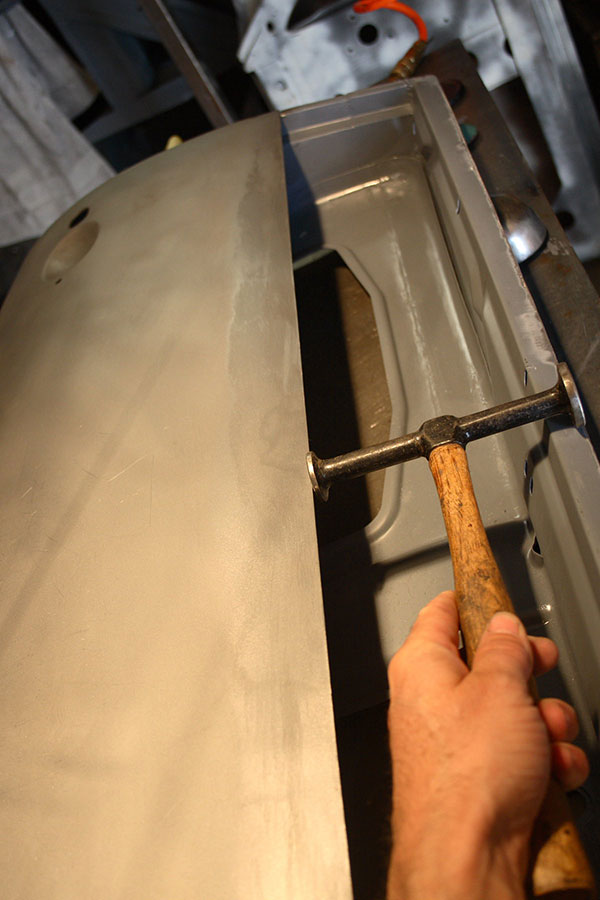
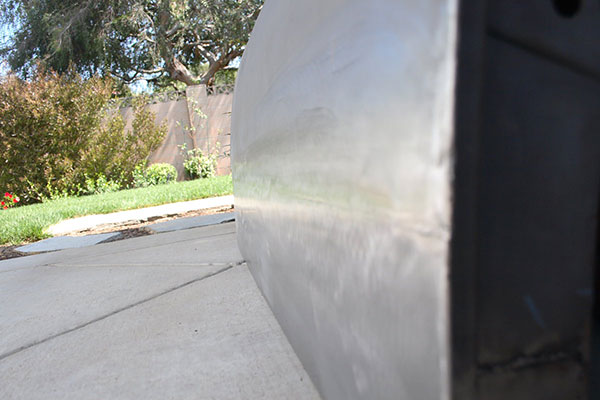
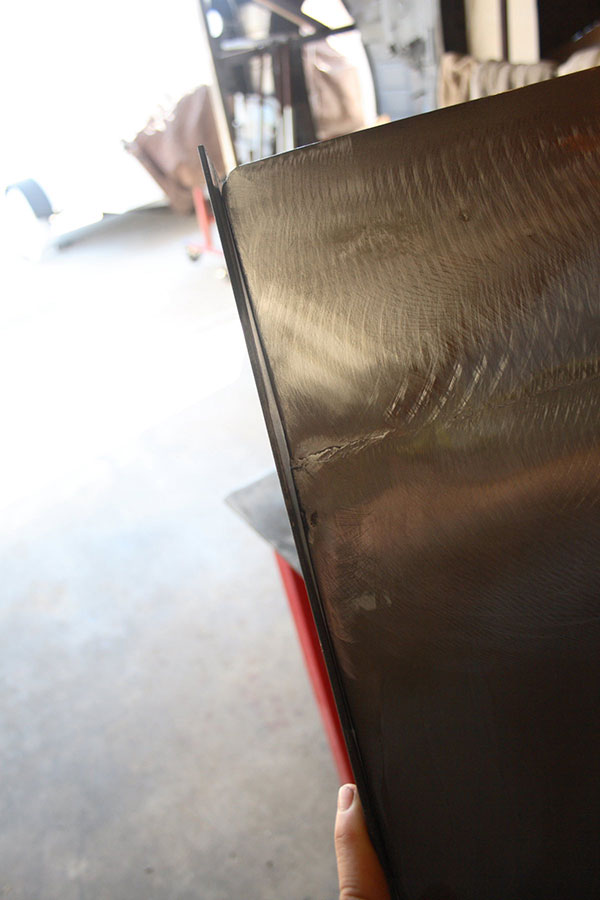
Part II finished the inner door structure and now comes the important part, the lower door skin. The pictures below show the hemmed edge that was too long to fit into my small press brake, so it was formed by hand on a metal welding table. 20 gauge (.036″) best matched the old metal that I removed, so that is what I started with. While difficult to see in the pictures, some curvature was added from bottom to top of the door. I made a vertical template from this door and matched it up with a few known good doors to get the curvature just right. There is also a slight curvature going from front to back that is mostly held in place by the door bottom flange which also had to be adjusted just right.

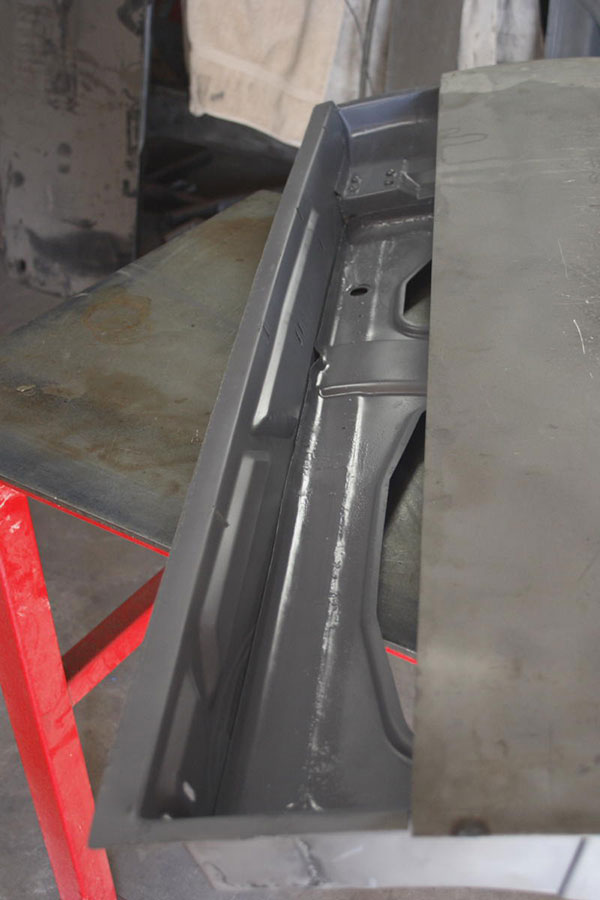
Prior to welding the skin on, the door bottom received a thorough cleaning, osphoric acid treatment and then liberal amounts of epoxy primer was applied.
Since welding the door skin will inevitably shrink the metal at the seam, I decided to pre-stretch the metal prior to welding. In theory this should help, unfortunately I don’t have enough experience with and without this technique to be certain that it works. I did notice that it thickens the metal some at the weld joint which is handy. I stopped hammering the edge when the metal began to oil can and bend out of shape. Both panels fit perfectly prior to stretching the metal so no strange stresses were on the metal during the welding process.

The first few tacks were in the middle of the door and I worked from the inside out with small tacks. After the metal cooled and finished shrinking, I hammered on dolly directly over the weld to stretch the metal back to its original shape. The welding process is easy and quick, but the hammering and checking the panel distortion takes 10X longer. Once the panel was tacked every five inches or so the door really began to look good. Now that I’m writing this I wish I would have taken more pictures during the process, but I was so nervous about messing it up I didn’t dare break my concentration.
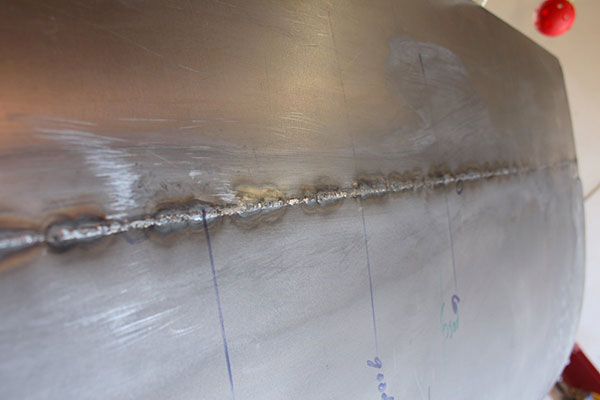
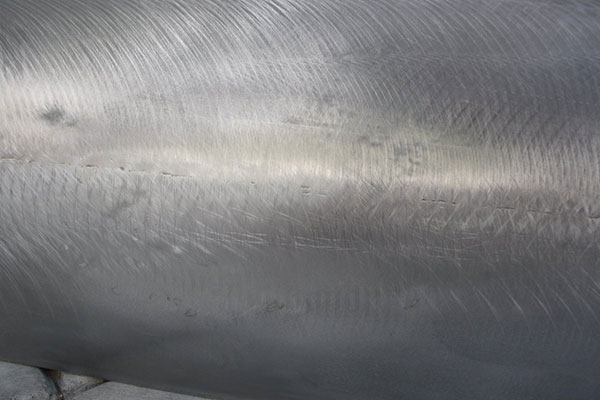
Weld lengths were kept less than about 3/8”. As I continued to weld more and more distortion crept in. As temping as it is to just keep welding along, it’s important to stop and correct the distortion as you go. Nasty curvature can be seen as far as 5” from the weld line. While also tempting to hammer all the low spots, I only concentrated on the weld line’s blue heat affected zone. The theory is that the panel fit ok before welding and the only shrinkage occurs in the heat affected zone. It took me a while to really get acquainted with the feel and sound of the metal being worked by the dolly and hammer. The technique is hard to explain in text, but here’s the summary. Apply medium pressure on the back side of the weld seam with a dolly that matches the curvature or is slightly higher crown. Lightly tap on the outer skin until the metal rings, then increase the hammer pressure and number of hits until the metal starts to stretch. Monitor the progress with various templates, then mark areas on the metal that need to be shrunk or stretched. Easy does it, and never hammer harder than necessary. It’s a time consuming and noisy process at least for me.
In a few cases, I had a high spot or oil-can surface. My TIG torch was used to lightly heat a few small areas to re-shrink the metal and the problems quickly went away. Writing about it is much easier than actually doing it. I was overly cautious since I’m a newbie, but at least 10 hours were spent welding this seam to look like it does here.
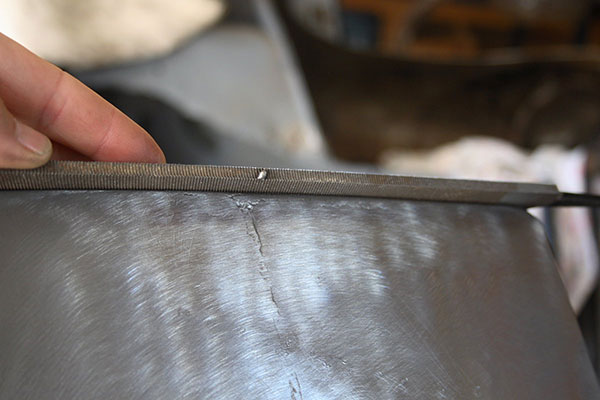
Not much grinding was required to smooth the weld. The hammering actually smoothes some of the weld and I didn’t use too much fill rod to begin with (.023” Mig wire used as fill rod). I ground the weld down with a small air powered angle grinder with 80 grit 2” disks.A large disc sander followed the grinder to blend all the grinding marks for a better camera picture.
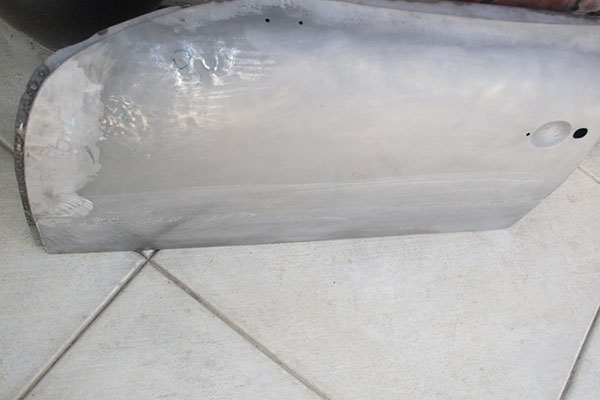

The surface is not absolutely perfect and will require a skim coat of filler, but I’m very happy that it’s within 1/16” or less to perfect.
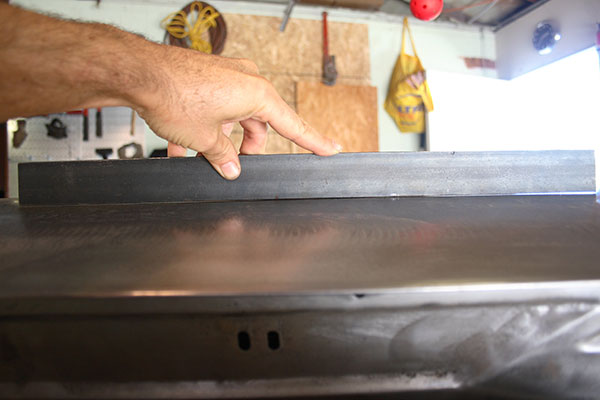
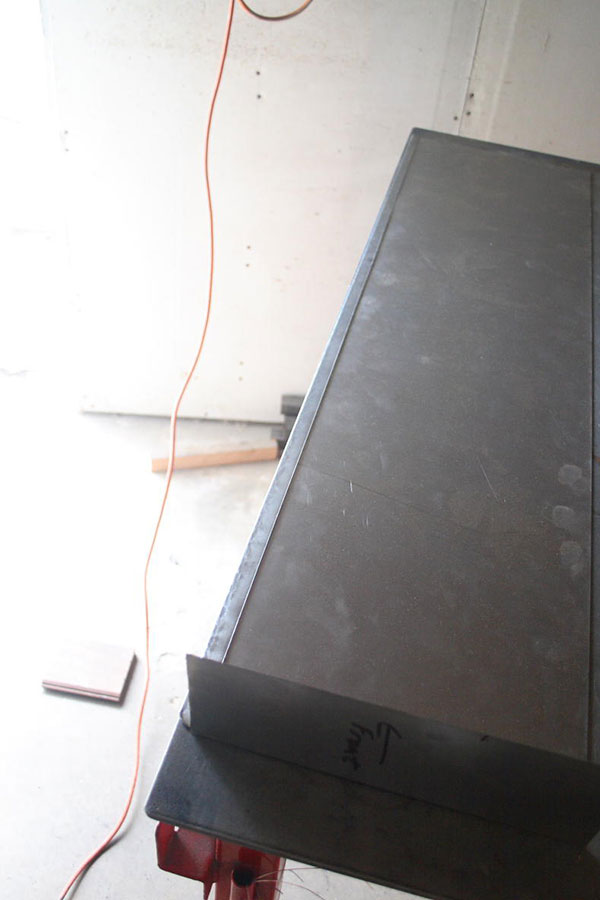
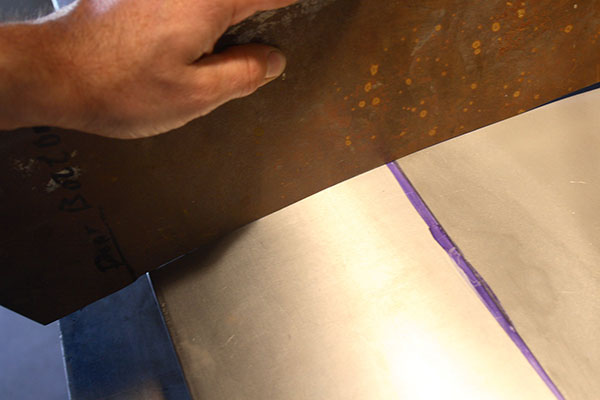
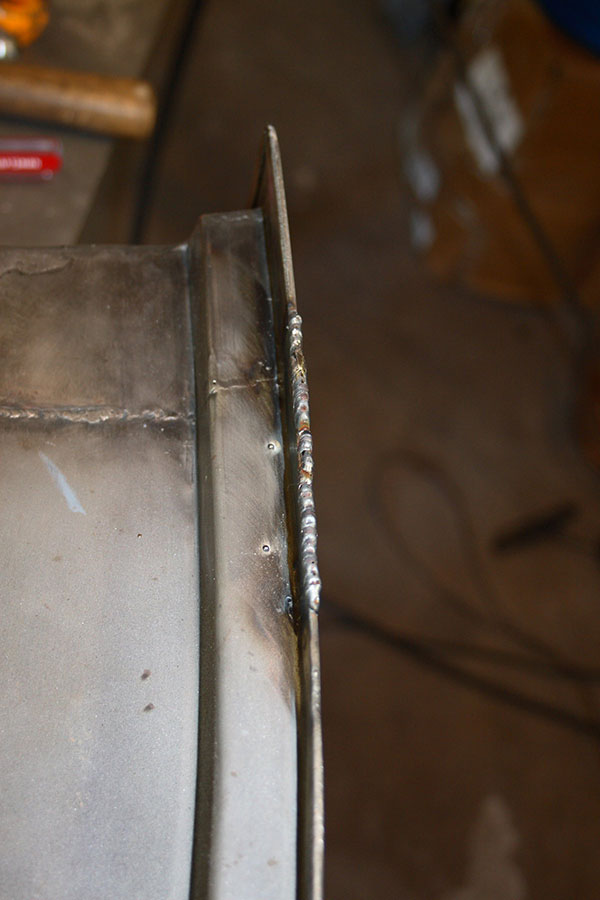
One of the keys to success is good panel fit. Extra care was taken to ensure that the long seam had a near perfect gap
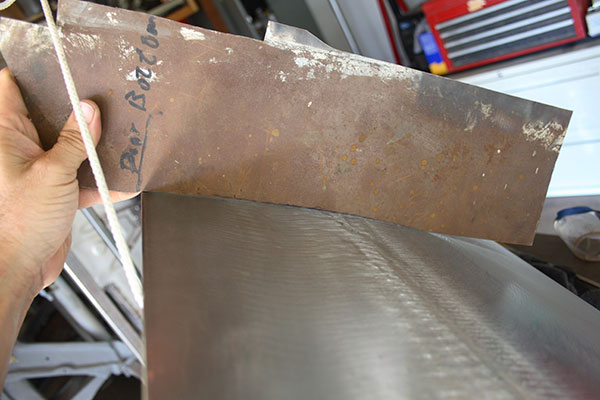
of 0 to .025”. I didn’t do such a stellar job on the hemmed edge below.

Measure twice, cut once as they say, but in my case I didn’t notice the edge wasn’t formed right until it was too late. So I had to build the edge with a weld bead. This affected the skin a little, so more massaging was required but this time off the weld area since it was impossible to stretch the hemmed metal with the weld bead on it. So, the lesson is to always take the time to make sure the panel fits perfect, perfect, perfect before welding, even if it means making it over again.

Would a NOS door be better?….You betcha. But I had a lot of fun fixing my original door and I learned a lot in the process. If nothing else, I have a lot of respect for the craftsmen who routinely crank out quality metal repairs all day long. True metal shapers do earn their money, and I’m not claiming to be one of them! Steve Hogue is one of my mentors and taught me all of the basics used here. Thank You! Tom